
If you’re working with Apache JMeter, you probably know that its powerful capabilities can be extended further with plugins. Installing JMeter plugins can make performance testing even more flexible and efficient by adding extra features, samplers, and listeners to your test plans. In this guide, I’ll walk you through the simple steps of installing JMeter plugins and how to start using them.
What are JMeter Plugins?
JMeter plugins are additional tools that can be integrated into JMeter to expand its functionality. Plugins are commonly used to:
- Add extra test elements (e.g., samplers, listeners, timers).
- Enhance reporting and visualization.
- Include new protocols for testing.
- Improve scripting abilities for complex scenarios.
Why Use JMeter Plugins?
Plugins can make your JMeter experience smoother by:
- Improving Test Scenarios: With additional samplers, controllers, and pre/post processors, you can create more advanced test plans.
- Enhanced Reporting: Plugins offer better reporting and result analysis, including graphs, charts, and tables.
- Easy Installation: Plugins are easy to install and configure, allowing you to focus more on your testing tasks.
Step-by-Step Guide to Installing JMeter Plugins

There are two main ways to install JMeter plugins: using the JMeter Plugins Manager or manually. I’ll explain both methods in detail below.
Method 1: Using JMeter Plugins Manager (Recommended)
The JMeter Plugins Manager is the most convenient way to install, update, and manage plugins. It allows you to search for plugins and install them directly within JMeter. Here’s how to do it:
Step 1: Install the Plugins Manage
- Download the Plugins Manager:
- Go to the official JMeter Plugins website: JMeter Plugins Manager Download.
- Download the
PluginsManager.jarfile.
- Place the Jar File in the Right Directory:
- Copy the
PluginsManager.jarfile and place it inside the/lib/extfolder of your JMeter installation directory.- For example, if you’re using Windows, this might look like:-
- Copy the
C:\apache-jmeter-<version>\lib\ext\Step 2: Launch JMeter and Access the Plugins Manager
Open JMeter: Once the PluginsManager.jar file is in the correct folder, launch JMeter.
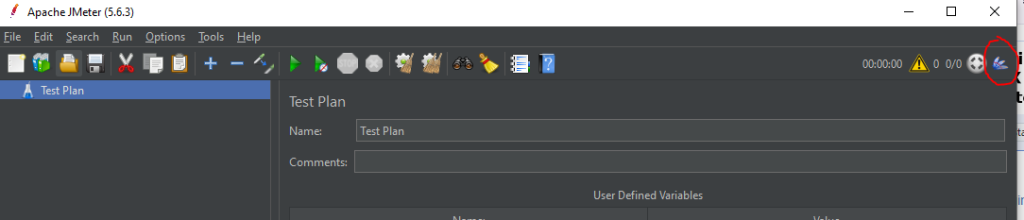
Open Plugins Manager: You should see a new option called Plugins Manager under the Options menu. Click on it to launch the manager.
Step 3: Install Plugins
- Search for Plugins: In the Plugins Manager, you’ll see a list of available plugins. You can search for specific plugins using the search bar or browse by category.
- Select and Install: Choose the plugin(s) you want to install by checking the box next to the plugin name.
- Click Apply Changes and Restart: After selecting the plugins, click on Apply Changes and Restart JMeter. JMeter will close and reopen with the newly installed plugins available.
Some popular plugins include:-
- Custom Thread Groups: Provides additional thread group types like Stepping Thread Group and Ultimate Thread Group.
- PerfMon Metrics Collector: Useful for server-side performance metrics during load testing.
- Graphs Generator: Improves reporting with detailed graphs and charts.
Method 2: Manual Installation of JMeter Plugins
If, for any reason, you cannot use the Plugins Manager, you can manually install JMeter plugins by downloading the plugin files and placing them in the appropriate directories.
Step 1: Download the Plugin
- Go to the JMeter Plugins Website: Visit the JMeter Plugins website.
- Choose a Plugin: Navigate to the plugin you want to install and download the corresponding
.jar file.
- The
.jarfile is the executable that adds new functionalities to JMeter.
Step 2: Place the Plugin in the JMeter Directory
- Locate JMeter’s
lib/extFolder:- Go to the JMeter installation directory, and open the
lib/extfolder.- For Windows:
C:\apache-jmeter-<version>\lib\ext\ - For Mac/Linux:
/apache-jmeter-<version>/lib/ext/
- For Windows:
- Go to the JMeter installation directory, and open the
- Copy the Plugin Jar File: Move the downloaded
.jarfile into thelib/extfolder.
Step 3: Restart JMeter
- Close and Reopen JMeter: Once you’ve placed the plugin file in the right directory, restart JMeter.
- Verify Installation: After restarting, you should see the newly installed plugin under the relevant sections (samplers, listeners, thread groups, etc.).
Verifying and Using Installed Plugins
Once you’ve installed a plugin, it’s time to verify it:
- Open JMeter and look for new elements in the Test Plan creation window.
- For example, if you installed the Custom Thread Groups plugin, you should see additional thread groups in the Add > Threads (Users) menu.
- Configure the Plugin: Select the installed plugin and configure it according to your test plan needs.
- Run the Test: Execute your test plan to see the plugin in action.
Uninstalling Plugins
To uninstall plugins, simply open the Plugins Manager, uncheck the plugins you wish to remove and, click Apply Changes and Restart JMeter.
Conclusion
Adding JMeter plugins is a fantastic way to extend the capabilities of your performance testing toolkit. With the Plugins Manager, installation is straightforward, and you can easily find and manage new features to improve your test plans. Whether you need better visualization, custom thread groups, or enhanced reporting, JMeter plugins have you covered.
By following the steps in this guide, you’ll be able to install and start using plugins in no time. If you run into any issues or have specific plugin recommendations, feel free to share them in the comments below.
Happy testing!